An Eternal Golden Braid
"All the good ideas I ever had came to me while I was milking a cow." (Grant Wood)
It was back to the Henry Farm Inn again this weekend, for another wonderful weekend of sewing with Anne Gallo and Susan Raban. We spent an extra day this time, arriving on Thursday evening, departing on Sunday. Normally these workshops run Friday-Sunday, but we’d decided we wanted more time to work on things.
This was a small group this time, only 6 sewers. In addition to our core group of me, Ken, Cindy, and my God-children Emerald and Azureen, we were joined by Pat from Lowell, Mass. We all sort of worked on different projects this time. Ken and Cindy wanted to learn how to do braid quilts (one of Anne’s specialties), Pat was working on a pinwheel quilt, Azureen did a bunch of little projects, including making some quilted purses, and Emerald went off and did a project of her own invention, with amazing results.
As for me, I had already taken Anne’s braid class at Quilter’s Way, so Anne decided I should just play around with braid variations. She did not arrive until Friday afternoon, but she had Susan deliver a piece of graph paper with a diagram of a braid variation and the notation “For Rick to make”. Here’s Anne’s original version:
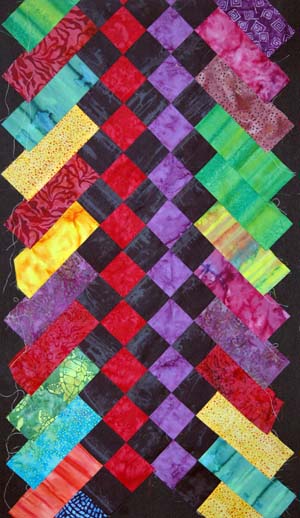
The variation here was the additional two square blocks around the braid points, one in color, one in black. This was interesting, but it created a bit of separation between the braid units that sort of lost the braid effect. I suspect it would show up a little better if paired with additional braid units.
Next I decided to try something a little more complicated. The colored squares were nice, but a block made with half-square triangles would look right at home there. Here is variation #2.
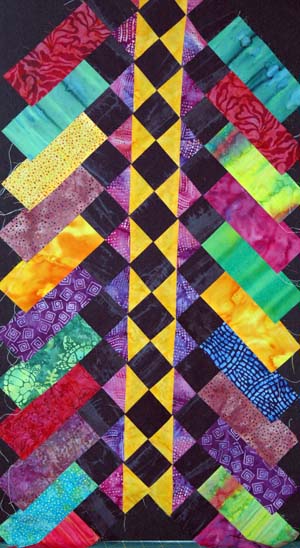
This one worked out great! The half squares in the middle created a nice point of interest in the middle, but also enhanced the appearance of the braids rather that creating a big space between them. A bit more complicated to make. I was glad I had brought my Easy Angle ruler with me, since I had only brought 2 1/2 inch strips with me.
I was not ready to give up on the first variation yet. I felt it was still possible to create some unifying structure in the middle using just squares, but a little more interesting color structure was needed. By this time it was lunch, so we combined a lunch run with a trip to Quilt-A-Way fabrics. At Quilt-A-Way, I picked up some gray and white fabrics. When I got back to the machine, I used these fabrics with the black to create a gradient in the middle. This time I made two braid strings and combined them.
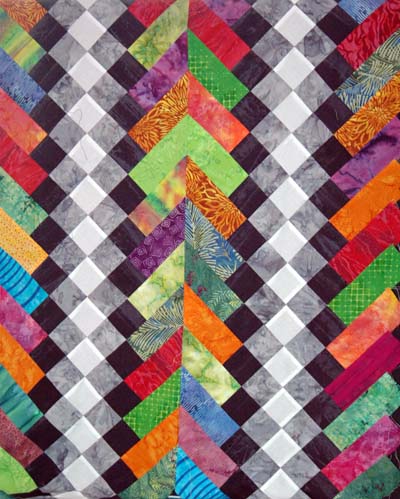
This was “way cool”! The center stripe became the focal point, and the braid strips created a nice frame around the stripes.
Now I was starting to roll. One of the variations I’d used before used a black strip along side the braid to create a stained glass effect in the braid. I decided it was time to try some variations on the black leading. My first attempt was pretty much a flop…amazingly, the only real failure I had this weekend.
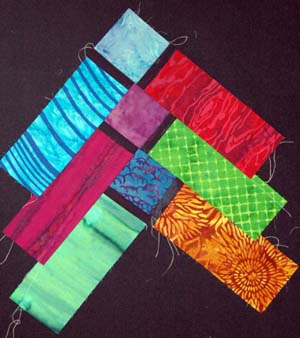
The attempt to use the short strips just didn’t work. And it didn’t take too many rows to figure this out either. I was pretty sure how it could be fixed, however.
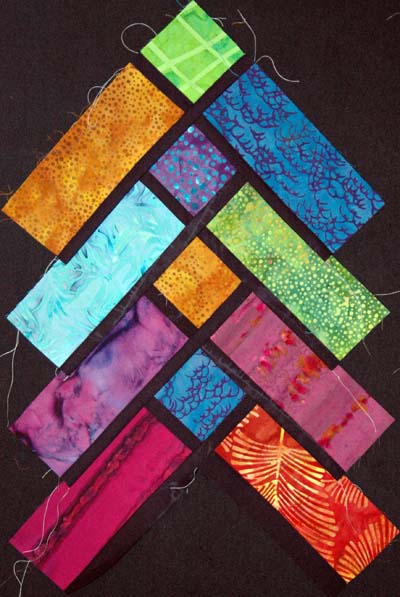
This was much better, and one of my favorite designs from the weekend. Ok, one more variation on the leading.
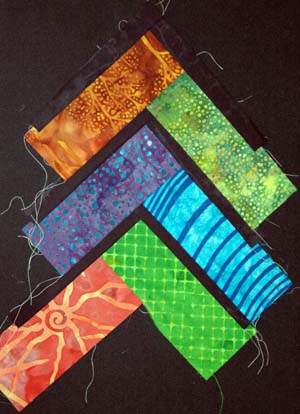
This one used the strips to separate entire chevrons. The traditional use of the leading oriented the strips so each braid piece was completely framed. I think this variation would work best if the same color strip was being used for both sides of the chevron. Note the little goof I made here on the bottom. I forgot which way I’d been sewing, so I switched sewing directions after the first chevron….oops!
This lead to experiments with varying the size of the braid strips, which produced a number of interesting effects. Attempt #1 was essentially the same as the one above, but used colored strips cut to 1 1/4” rather than black 1” strips.
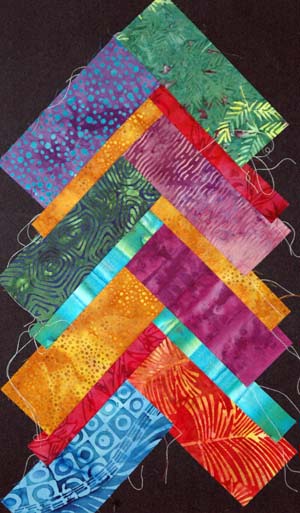
This was a very nice effect. I tried mixing narrow and wide strips on the same chevron, and also switching the wide/narrow sides back and forth.
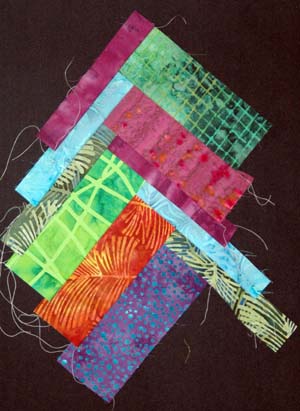
This was sort of interesting…not entirely sure how I’d use it, but it’s interesting none the less.
Another standard braid variation uses a black square at the point. Anne suggested trying this with the different sized strips.
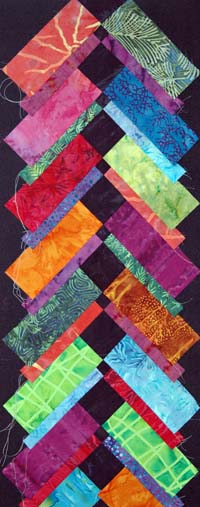
Another one in the “way cool” category. The switch between the small black squares and the large black square was a very interesting effect. This one lead me to try the version with the leading around the squares with the different sizes.
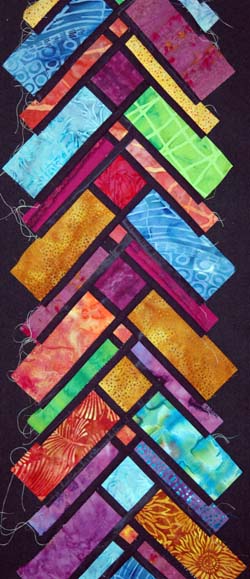
Wow! I think this was my favorite variation from the weekend.
By this point, I was starting to run out of ideas. I thought it might be interesting to add a black square on the end of each chevron piece, rather than just a single piece used to create the blocks effect. This created a zig-zag pattern down the middle of the braid. This version again needed to be combined with a second braid to be affective:
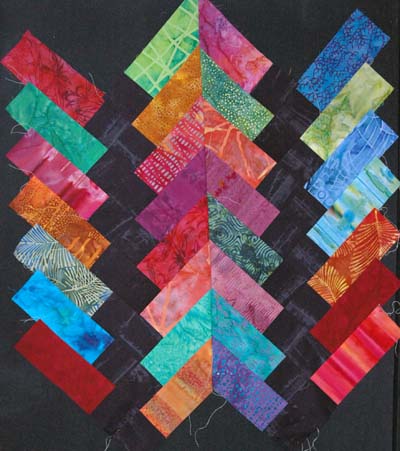
By this point, I was tapped out. Pat suggested I try playing with the color placement instead of the structure. I had picked up a bunch of sea color fabrics at Quilt-A-Way, so decided to try a gradient effect.

This was pretty neat. I think I’m going to end up using this piece as the background for some sea life applique. I’ll see what I can come up with here.
Ok, at this point, I was tapped out. Fortunately, it was dinner time, so I was able to take a break. Anne and I were batting around some ideas at dinner, and suddenly the light bulb went off….flying geese on the braids!
After dinner, I immediately jumped back into it. Here’s my first flying goose attempt, using quick folded flying goose blocks on the chevrons.
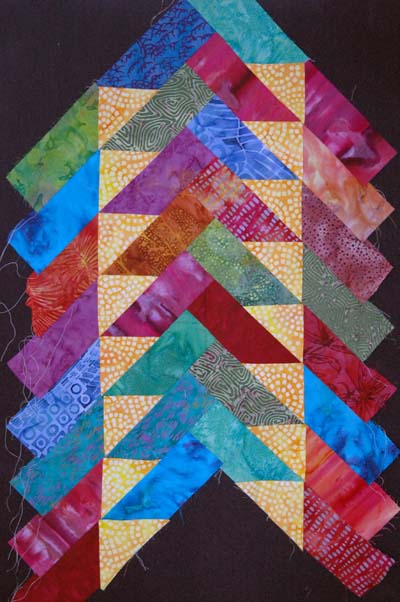
I loved the movement this created, and I particularly like the way the braiding in the center section really stood out. At this point, all sorts of possibilities around this motif were flying through my head. I only had time to do a couple more, unfortunately. The one above used long side strips on either side of the goose. For my second version, I decided to use a black point block, and butt the goose strips up against the center block.
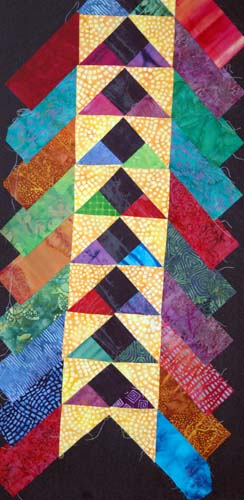
This created an interesting delta-wing formation in the middle, as well as making the braid section part of the wings. And my final variation of the weekend, which was essentially the same as the first flying goose block, but using black for the goose part.
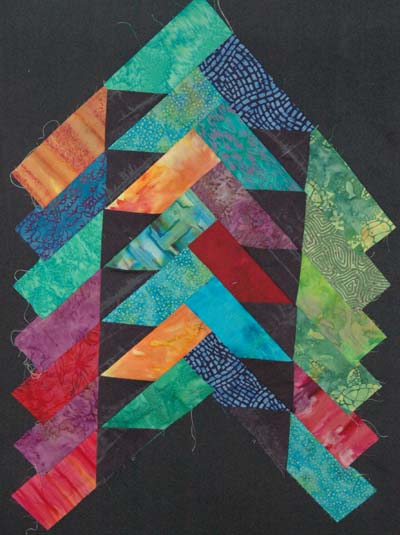
Even though this is the same design as the previous one, it has a completely different look because of the change of fabric. In this one, the geese are de-emphasized, and the braids stand out more strongly.
Well, that was the end of the weekend. Since I’d just spent three weeks working rather intensely on Emerald’s graduation present, it was a very nice break to just sit and play with these designs. At some point, I’m going to see if I can’t assemble all of these strips into a single sampler quilt. This will certainly be an interesting challenge.


5 Comments:
Very impressive. Am not sure how to do chevrons and can't find out how you start hence my web search. I like the look of your variations - but how much do you spend on material!!! anyway just thought I'd say thanks for sharing this stuff.
Wow, what a neat little 'experiment'. I especially love the one using sea-color fabrics. I've just been inspired! :)
cool beans and hot rice...this is great! How 'bout a tutorial?
These are just gorgeous! The french braid pattern is my favorite and use it often. However, it was getting a little tedious making the same thing (with different fabric) so am looking forward to trying some of these variations. I can't wait to get to my fabric stash! I liked the first one best then the flying geese attached to the top square. But ALL of them are fantastic. Thank you for sharing them.
Oasis
Like your creations, I have one too, you might like to see!
http://inlinethumb07.webshots.com/15046/2284387950044457083S425x425Q85.jpg
Hope this works! These braids are really fun to play, thanks for all your ideas!
Happymrs/NC...
Post a Comment
<< Home